DIY Herb Salt: Flavor Your Meals & Preserve Herbs Easily
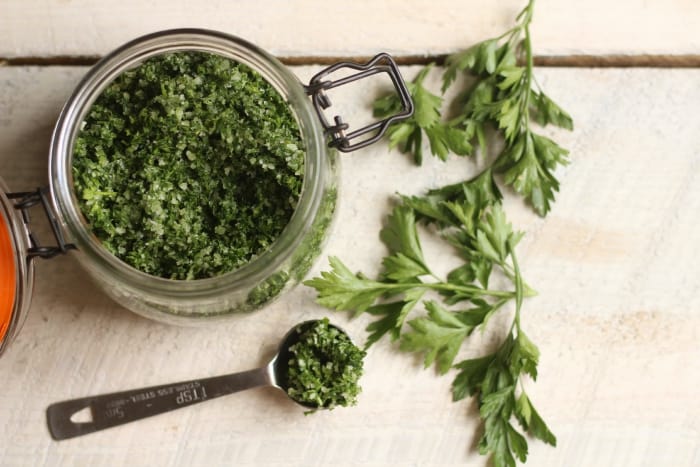
Imagine elevating every meal with a simple sprinkle of something extraordinary – a burst of fresh, aromatic flavor that transforms ordinary dishes into culinary delights. That's the magic of homemade herb salt. Far more than just a seasoning, learning
how to make herb salt at home is a rewarding journey into flavor crafting, herb preservation, and sustainable cooking. It’s a secret weapon for home cooks, allowing you to capture the vibrant essence of your garden herbs long after their season has passed, or to infuse store-bought dried herbs with new life and personality.
This guide will walk you through the surprisingly simple process of creating your own custom herb salts, revealing the techniques, ingredient choices, and creative possibilities that await you. Get ready to add an incredible depth of flavor to your cooking, create thoughtful homemade gifts, and embrace the satisfaction of crafting something truly special from scratch.
Why Make Your Own Herb Salt? The Benefits Beyond Flavor
While the primary allure of herb salt is undoubtedly its ability to infuse dishes with incredible flavor, the advantages of making your own extend far beyond taste alone. Opting for a homemade approach offers a wealth of benefits that cater to both your pantry and your pocket.
*
Exceptional Flavor Depth: Store-bought salts often lack the vibrancy and complexity of fresh herbs. Homemade versions, especially when using fresh herbs and drying them with the salt, capture a much more potent and nuanced flavor profile that continues to develop over time. This concentrated essence can dramatically enhance anything from roasted vegetables and grilled meats to eggs and simple olive oil dips.
*
Effective Herb Preservation: If you're a gardener with an abundance of herbs, or simply find yourself with extra fresh herbs from the market, making herb salt is an ingenious way to prevent waste. By infusing salt with the herbs, you effectively preserve their flavor for months, ensuring you can enjoy the taste of summer even in the dead of winter. This method is particularly useful for delicate herbs that don't dry well on their own.
*
Remarkable Cost-Efficiency: Gourmet flavored salts from specialty stores can be surprisingly expensive. By contrast, making your own herb salt requires just two primary ingredients – salt and herbs – both of which are generally affordable. This DIY approach offers significant savings without compromising on quality or taste. If you're looking for an affordable yet thoughtful present, learn more about
Homemade Herb Salt: The Perfect Cost-Efficient DIY Gift for Foodies.
*
Endless Customization: One of the greatest joys of making herb salt is the freedom to experiment. You're not limited to common blends; you can craft unique flavor combinations perfectly tailored to your culinary preferences. Want a Mediterranean blend? A spicy kick? A delicate floral note? The possibilities are endless when you control the ingredients.
*
Thoughtful & Unique Gifts: Small jars of beautifully packaged homemade herb salt make fantastic gifts for foodies, hosts, or as party favors. They are personal, practical, and show a level of care that store-bought items simply can't match.
Choosing Your Ingredients: The Heart of Your Herb Salt
The success of your homemade herb salt begins with selecting the right foundation: your herbs and your salt. Each component plays a crucial role in the final flavor and texture of your blend.
Selecting Your Herbs: Fresh vs. Dried
Both fresh and dried herbs can be used, each offering a slightly different result.
*
Fresh Herbs: Provide the most vibrant, intense flavor and aroma. When dried with salt, their essential oils are perfectly preserved. Excellent choices include:
*
Rosemary: Pungent, piney, and incredibly versatile. A classic choice for herb salt.
*
Sage: Earthy, peppery, and ideal for poultry or root vegetables.
*
Oregano: Robust, slightly bitter, and perfect for Mediterranean dishes.
*
Thyme: Delicate, lemony, and wonderfully aromatic.
*
Parsley & Dill: Fresher, brighter notes, though these can lose some intensity if dried for too long.
*
Mint & Basil: Can work, but use sparingly as their flavors can become dominant or slightly muted after drying.
*
Important Tip: Always wash fresh herbs thoroughly and pat them *completely dry* with a kitchen towel. Moisture is the enemy of shelf-stable salt. Crucially, remove all stems, as they can impart a bitter taste to your finished salt. We're only using the flavorful leaves!
*
Dried Herbs: A convenient option, especially if you don't have fresh herbs readily available. While their flavor is less intense than fresh, blending them with salt immediately infuses the crystals. Use good quality, recently dried herbs for the best results.
Choosing Your Salt
The type of salt you choose impacts texture, taste, and how well it blends with the herbs.
*
Coarse Sea Salt: Often the preferred choice due to its larger crystals, which allow for better grinding and a more appealing texture. Its mineral content also contributes to the flavor.
*
Kosher Salt: Another excellent option, as its flaky texture blends well and dissolves easily. Ensure it's additive-free.
*
Himalayan Pink Salt: Adds a beautiful color and subtle mineral notes. Choose a coarse grind.
*
Avoid Fine Table Salt: Its fine texture can make the herb salt too dense and clumpy, and it often contains anti-caking agents that aren't ideal for gourmet blends.
Optional Add-Ins for Extra Zing
Don't stop at just herbs! Elevate your herb salt with these delightful additions:
*
Garlic: Fresh minced garlic (when drying the salt) or dried garlic granules add a savory depth.
*
Chili: Dried chili flakes or a pinch of cayenne pepper bring a welcome warmth and heat.
*
Citrus Zest: The zest of lemons, oranges, or limes adds a bright, zesty aroma (best when dried with the salt).
*
Spices: Paprika for smokiness, curry powder for an exotic twist, or even a tiny pinch of vanilla powder for a unique, sweet-savory salt perfect for desserts or coffee.
Mastering the Methods: How to Make Herb Salt Like a Pro
The beauty of homemade herb salt lies in its flexibility. There are essentially three core methods for preparation, each suited to different needs and timelines. Understanding these approaches is key to successfully crafting your own blends. For a deeper dive into these techniques, check out
Mastering Herb Salt: 3 Methods for Custom Flavor & Preservation.
Regardless of the method, remember the foundational steps: if using fresh herbs, wash and pat them *bone dry*, then strip the leaves from the stems.
Method 1: Fresh Herbs for Short-Term Use (Refrigerated)
This is the quickest way to enjoy a vibrant, fresh herb salt, perfect if you plan to use it within a week or two.
1.
Prepare Herbs: Wash, thoroughly dry, and strip the leaves from about 1/2 cup of your chosen fresh herbs (e.g., rosemary, sage).
2.
Blend: Combine the fresh herb leaves with 1 cup of coarse salt (and optional minced fresh garlic) in a food processor or spice grinder. Pulse until the mixture is finely blended and resembles damp, green-flecked salt. You can achieve a finer or coarser texture based on your preference.
3.
Store: Transfer the fresh herb salt to an airtight glass jar and store it in the refrigerator. Due to the moisture from the fresh herbs, it will have a shorter shelf life (1-2 weeks) and may clump slightly. This method retains the brightest, freshest aroma.
Method 2: Fresh Herbs + Drying (Oven or Air-Dry) for Long-Term Storage
This is the gold standard for preserving fresh herb flavor and achieving a shelf-stable product. It allows the salt to absorb the herb's essential oils as it dries, intensifying the flavor.
1.
Prepare Herbs & Blend: As with Method 1, wash, dry, and strip about 1/2 cup of fresh herb leaves. Combine with 1 cup of coarse salt (and optional minced fresh garlic or citrus zest) in a food processor. Pulse until finely blended. The mixture will be moist.
2.
Spread for Drying: Spread the damp herb salt mixture evenly in a thin layer on a baking sheet lined with parchment paper. The thinner the layer, the faster it will dry.
3.
Drying Options:
*
Oven Drying: Place the baking sheet in an oven set to its lowest temperature (typically 150-200°F / 65-95°C) for 1-2 hours. If your oven goes lower, even better. It’s crucial to *not cook* the herbs, but rather gently dry them. Stir occasionally to ensure even drying. The salt is ready when it's completely dry and free-flowing. Turn off the oven and let it cool completely inside.
*
Air Drying: For a more hands-off approach, simply leave the baking sheet in a dry spot at room temperature, away from direct sunlight. Stir once or twice a day. This method can take 2-5 days, depending on humidity.
4.
Cool & Store: Once completely dry and cooled, transfer the herb salt to an airtight glass jar. Store in a cool, dark place. This method yields a robust, long-lasting herb salt with an excellent shelf life of several months.
Method 3: Dried Herbs for Instant Flavor
The simplest method, perfect for when you want a quick batch or are using store-bought dried herbs.
1.
Combine & Blend: Take 1/4 cup of your chosen dried herbs (e.g., oregano, thyme, a mix of Italian herbs) and 1 cup of coarse salt. Place them in a food processor or spice grinder.
2.
Pulse to Combine: Pulse a few times until the herbs are finely incorporated into the salt. You can keep it slightly chunkier for a more rustic texture or blend it finer for a more uniform product.
3.
Store: Transfer immediately to an airtight glass jar. This salt is ready to use right away and has a very long shelf life, limited only by the freshness of your dried herbs.
A Note on Blending Texture
For a finer, more refined green salt, blend the herbs, salt, and any other ingredients all at once. If you prefer larger salt crystals and a coarser texture, first pulse only the herbs until they reach your desired consistency, then add the salt and pulse just a couple more times to combine without over-grinding the salt.
Beyond Rosemary: Creative Herb Salt Blends to Explore
While rosemary salt is a classic for good reason, don't limit your imagination! The world of herb salts is ripe for experimentation. Here are some inspiring blends to get you started:
*
Mediterranean Magic: Combine dried oregano, marjoram, thyme, and a pinch of dried orange or lemon zest with coarse sea salt. Fantastic for fish, chicken, or roasted vegetables.
*
Spicy Savory: Blend fresh rosemary or thyme with dried chili flakes, a clove of fresh garlic (if drying), and sea salt. Perfect for grilling, potatoes, or rimming a Bloody Mary glass.
*
Italian Garden: Mix dried basil, oregano, thyme, and a hint of dried garlic powder with Kosher salt. A must-have for pasta sauces, pizza, or focaccia.
*
Earthy Sage & Onion: Combine fresh sage leaves with dried onion flakes and coarse salt. Ideal for pork, stuffing, or roasted root vegetables.
*
Herbes de Provence Twist: Use dried savory, thyme, rosemary, marjoram, and a touch of lavender buds (optional, for a subtle floral note) with sea salt.
*
Citrus Herb Brightness: Zest of one lemon, fresh parsley, fresh dill, and sea salt. Great for brightening up seafood or salads (use Method 1 or 2 for drying).
*
Smoky & Sweet: Paprika, a touch of brown sugar, dried thyme, and coarse salt. Wonderful for BBQ rubs.
Start with small batches to discover your favorite combinations. Remember, the key is to balance the flavors so no single herb or spice overwhelms the others.
Storing and Using Your Homemade Herb Salt
Once your herb salt is made, proper storage ensures its longevity and potency. For dried herb salts (Method 2 and 3), store in airtight glass jars in a cool, dark pantry. Avoid direct sunlight or humid areas. For fresh, undried herb salts (Method 1), keep them tightly sealed in the refrigerator and use within a couple of weeks.
The uses for homemade herb salt are truly endless:
*
Finishing Salt: Sprinkle over eggs, avocado toast, pasta, grilled meats, or roasted vegetables just before serving.
*
Cooking Seasoning: Use it to season meats, poultry, fish, soups, stews, or even a simple vinaigrette.
*
Dipping Oil: Stir a teaspoon into good quality olive oil for an instant bread dip.
*
Baking: Incorporate into bread doughs, focaccia, or sprinkle over savory muffins.
*
Popcorn Perfection: A sprinkle of herb salt transforms plain popcorn into a gourmet snack.
*
Marinades & Rubs: A fantastic base for dry rubs or liquid marinades.
Conclusion
Creating your own DIY herb salt is an incredibly rewarding culinary project. It's an easy, cost-effective way to preserve the bounty of your garden, elevate everyday meals with layers of incredible flavor, and even craft thoughtful homemade gifts. Whether you choose to blend fresh herbs for immediate use, dry them for long-term storage, or simply combine dried herbs with salt, the process is straightforward and yields impressive results. So, gather your favorite herbs, select your salt, and embark on your journey to flavor your meals and preserve herbs easily with this delightful kitchen essential. Your taste buds, and perhaps your lucky gift recipients, will thank you!